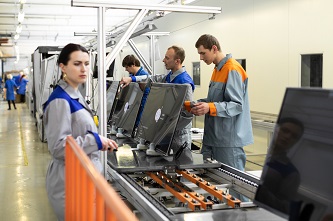
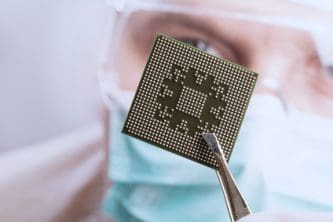
Semiconductors are extremely critical and central components in modern technology. Most of the electronic devices we use today operate on these integrated circuits that are housed on silicon wafer chips. It does, however, take a lot of processing and work to get the semiconductor in that condition from the raw material. The basic substrate of these microchips is the silicon wafer chip upon which all the microfabrication takes place. In this article, we will take a detailed look at just what constitutes the silicon wafer production process.
To begin with, we have to acknowledge that semiconductor wafers are made out of silicon- an element that makes up almost 30% of the Earth’s crust. It is the raw material that constitutes the basic structure of the whole semiconductor chip and is responsible for its optimum functioning. Rather than being a very good conductor of electricity, silicon has the property to control resistivity based on dopants. This silicon material has to be turned into a wafer before a semiconductor can be built on it. This means that the entire fabrication process to create the rest of the integrated circuit that will ultimately be a component of a larger electronic device rests on this tiny piece of a pure, crystal of silicon wafer.
Following are the steps involved in ultimately producing a silicon wafer which then undergoes even more process to be turned into a semiconductor:
Ingot Growth
The very first step in silicon wafer production is to grow a nugget of silicon, also referred to as a silicon ingot. Growing a single silicon ingot can take as less as one week to up to one month. The time taken for the ingot growth is determined by the size, quality, and the specification of the wafer. One of the most common methods used to grow the crystal is the Czochralski Method or the CZ Method. Another method is the Float Zone technique, but it is seldom used in the current practice. In the former method, polycrystalline silicon pieces are put in a trough made of quartz.
Small quantities of dopants are added which are basically elements from Group 3 and 4 of the periodic table, such as Boron, Phosphorus, Arsenic, or Antimony. These dopants are responsible for determining the properties of the resultant wafer material- it may be P type (Boron) or N type (Phosphorous, Arsenic, Antimony). The material is then heated above a temperature of 1412 degrees (usually above 1500 degrees) until everything has liquefied.
Then, a silicon crystal having the same orientation as the intended end result of the process is placed inside as a seed to facilitate the growth of the crystal with minimum defects. Once we reach the required diameter of the crystal, the process is stopped by stabilizing the conditions.
The resulting material is referred to as electronic grade silicon to EGS. This silicon ingot can subsequently be used to cut and molded into the shape needed for the final silicon wafers for the semiconductor.
Slicing
The end diameter of the grown ingot is usually kept a little bit larger than what is actually required. As a result, we need to slice the wafer after it has been adequately inspected. A diamond edge saw is used for this purpose to make the wafer thinner and smaller without causing any major damage.
Lapping
The next step once the wafers have been sliced is lapping. Lapping refers to when the marks and defects left behind because of the sawing and other surface abrasions are removed. This step also serves to thin out the wafer a bit more as well as relieve the stress that the wafer has undergone during the slicing process.
Cleaning
Once we are done with lapping, the wafers must be chemically etched and cleaned. This further helps to alleviate any cracks or surface defects that may still be there, even on a microscopic level. This is usually done using a bath consisting of sodium hydroxide, acetic acid, or nitric acid.
Polishing
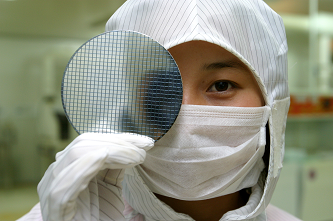
Finally, the wafer has to be polished to reach its final stage. This is performed in a clean room where the particle quantity per cubic foot is controlled to be somewhere between Class 1 to Class 10,000. Workers have to wear clean suits, work under a fan that blows away excess particles, and maintain a level of cleanliness on their workstations. High quality silicon wafers usually go through two to three stages of polishing. Wafers can either be single side polished or double side polished, with most only polished on the front. The polishing process itself has two stages- the first being the stock removal process which removes a thin layer of silicon to make sure the surface does not have any defects. The second part is the chemical mechanical polish which does not remove any silicon layers, but instead gives it a shiny, mirror finish.
Packaging
Once the silicon wafers are all nice and polished, they undergo a series of baths for proper cleaning and are inspected multiple times under high intensity lights to ensure there are no excess materials or defects on the wafer surface. After the cleaning and inspection is done, the wafers that meet the specifications and are in top shape are packed and sealed to be shipped out to the respective places in vacuum sealed plastic bags to keep the moisture out and prevent any damage during storage and travel before they are ultimately put to use as semiconductor substrates.